Tuesday, June 25, 2013

Jason, Tasha and the Chocolate Factory

Hello, time for another new from really old photos. These were taken in May of 2001 while on vacation. On the way back from Disney World we took a detour to the see the St. Augustine lighthouse and passed by a chocolate factory. How could we not stop? They gave tours and at the end you could sample the chocolate, we may have bought a bunch after that. It was so good! They are still there giving tours, Whetstone Chocolates.

Sorry for the tangent, here is the layout

Jason, Tasha and the Chocolate Factory

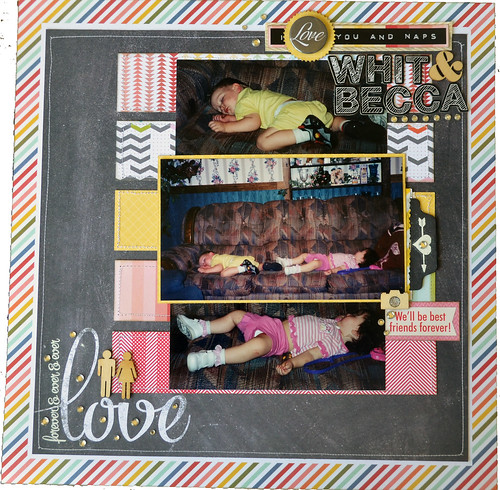
For this layout I used the June free sketch from Scrapbook Generation, you can download it here. This is a great sketch that is easy to adapt to your size photos.

Jason, Tasha and the Chocolate Factory embellishment close-up

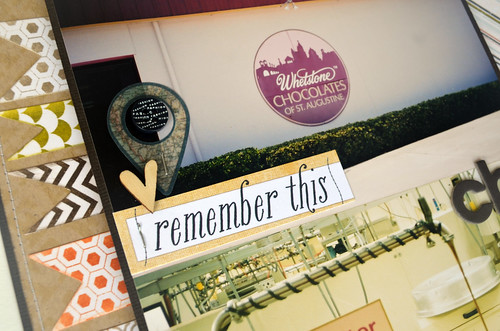
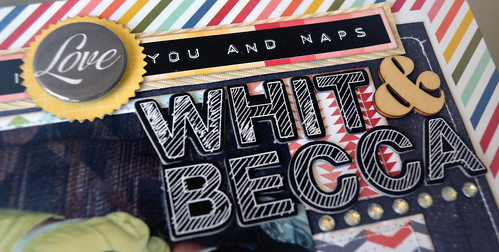
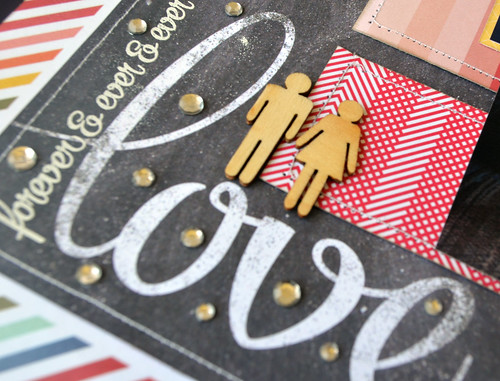
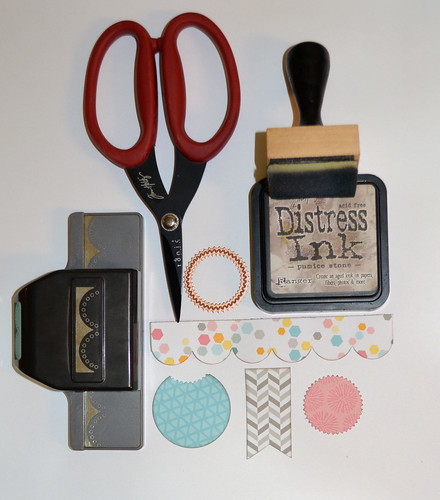
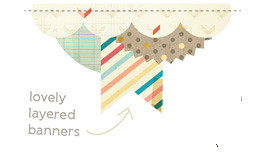
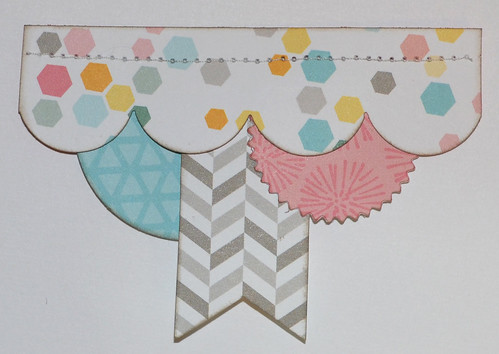
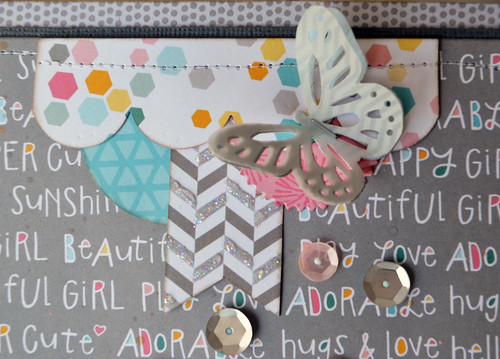
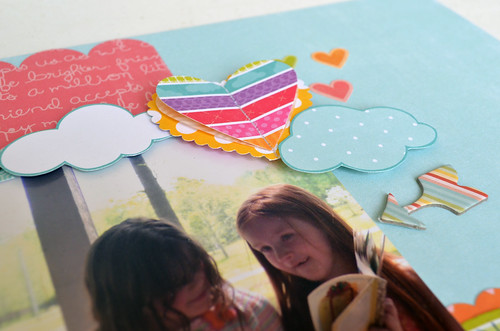
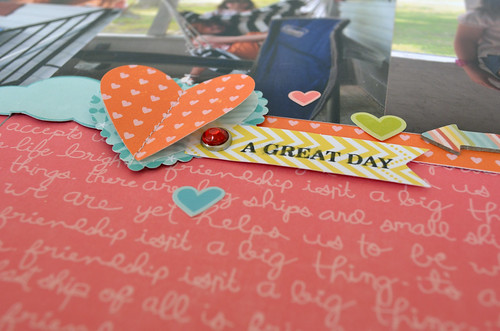
This layout doesn't have a lot of embellishment, mainly because I couldn't figure out what to use. I thought this would be the perfect opportunity to finally use a geotag. Why does Studio Calico put them out with almost every line in unrelated packs of items? Like the snippets veneer that is such a random mix. The banner is the main show stopper embellishment and the colors don't go with the photos extremely well but they do set off the patterned paper from Fancy Pants' Swagger line. I'm used to doing a more matchy-matchy color scheme instead of complimentary but I think I like it in this case.

Thanks for stopping by.

Sunday, June 23, 2013

Whit & Becca

Hello, back with the my final layout from the Sketch Support class. If you are new to sketches or even if you are like me and use them all the time, I highly recommend this class. You can find it here.

For some reason I wasn't as into this sketch, probably because I had no photos ready that would have remotely came close to the dimensions of the ones given. I could have searched through all my digital files and found something but I wanted to get this done quickly. On to my layout.

Whit & Becca

I chose to use the right side of the sketch for this one and tweaked it quite a bit. The photos are quite old, I believe they were taken in 2000, and are really dark. I decided to go with that and the first paper I chose was the Elle's Studio You and Me paper. I see people fighting dark, older photos by using everything light and bright and to me that just draws attention to the fact that they are dark. The layout does have a quite a few lighter patterned papers but the chalkboard paper helps to keep them in check.

Whit & Becca Title Close-up

I love that sticker from Pebbles and it was the perfect accent for this page. It originally said "I like you and naps," but since the chalkboard paper said "love" I decided to use a piece of flair to change it to match my theme. The dark sticker and flair together competed, a little piece of yellow patterned paper cut from my smallest nestabilities pinked circles die set helps to separate them and lighten it up a bit. I matted the sticker with patterned paper and then matted it with ribbon to help set it off. The challenge for the week was add some finishing touches and she gives several examples of what to add. Since I usually do add finishing touches I challenged myself to add things that I normally don't like flair and ribbon. Can you believe this is the first piece of flair I've ever used? I have lot but it never ends up on my finished projects.

Whit & Becca Corner Close-Up

I also did some heat embossing, something that I really need to start doing again. It adds a little something without being overwhelming or taking away from the word on the patterned paper.

Whit & Becca Hidden Journaling Card Close-Up

Last but not least I did a little embossing on the tag to pull out my hidden journaling. I couldn't figure out how to incorporate journaling into the actual layout so I tucked it away.

One thing I would like to point out is the focal photo has a lot of background in it, usually now I crop out distracting background to focus on the subject. However, I kept it this time because that was my Mother-In-Law's house, she passed away in 2006 and this house actually burned down I think it was four years ago. These photos are so precious because you can see little details of her life. I still miss her and she loved my scrapbooks, I would like to think she would like seeing her wallpaper and trinkets on display for everyone. If we keep going these little details will be lost and I'm here to tell you when they are gone you miss them.

Thanks for stopping by.

Friday, June 21, 2013

Your Love Of Reading

Another new page. I'm proud that I got two done this week, my husband came home early and I was able to really push hard to finish today.

This page is for week 4 of the Sketch Support class. To be honest it started with the left side of the sketch and kinda took on a life of its own. It has some elements that reference the sketch but not many. The challenge was to make your own embellishment, I believe I passed that with flying colors.

Your Love Of Reading

This page is using almost all new items from my recent hauls. I had items pulled already from my stash but I was tired of looking at them. If you look at my last couple of pages they are actually from the same day and I intended to keep using the same supplies but the My Girl collection called to me.

The part I am most excited about is my knock-off of a layered banner piece from Crate Paper's The Pier collection. I loved the look but it wouldn't match my layout, not that I have it since it's out of stock at A Cherry On Top.

The Pier Knock-Off Embellishment, Tools and Cut Pieces

That is the piece that I wanted to copy. It's really only 4 pieces layered and stitched together it was very easy to recreate.

The Pier Layered and Stitched Embellishment

My list of supplies along with my cut pieces, minus the sewing machine and Stickles. The scalloped piece is 1 inch wide, it's too long here but the finished piece is 4 1/2 inches long. The pinked circle is cut using the smallest die in the Spellbinder pinked circle die set. The plain circle is cut using a 1 and 3/4 inch circle punch. You can see mine is cut from a scrap and missing a piece, the missing chunk will be hidden with the layers. The banner really depends on your project mine is 1 inch wide, the length doesn't matter because you are layering it anyways. I inked the edges of everything with Pumice Stone Distress Ink, it helps to give a little more definition.

The Pier Knock-Off Embellishment Layered and Stitched Piece

All complete and stitched. I'm so happy with how this turned out and will be making several more for other layouts.

The Pier Knock-Off Embellishment Complete on Page

For the finished piece I used some Star Dust Stickles on the lighter gray pieces of the herringbone pattern. The original looks like it might have some glitter on the polka dot pattern of the pinked circle piece, I haven't seen it in person to know for sure. Now I'm looking forward to seeing what all I can recreate.

Thanks so much for stopping by.

Elle's Studio Haul

The final day of haul week. This is just a small order from Elle's Studio that includes the June Limited Edition kit. I bought the May kit and couldn't pass up the June, I actually like it even better than last months. While I would like to say I have the will power to just stop at the kit, I really don't. Thankfully I didn't go overboard.

Thanks for watching.

Thursday, June 20, 2013

My Scraps and More Haul

Hello lovely people. We are almost to the end of haul week. I told you I go a little crazy around my birthday each year, this year might be one of the worst yet. To be fair we were once the struggling newlyweds and had quite a few hard years. We've decided to treat ourselves these days to sort of make up for time lost, so far we are doing a bang up job.

My Scraps and More store.

Thanks for watching.

Wednesday, June 19, 2013

A Perfect Day

Finally got around to making my page for week three of the Sketch Support Class. My niece was here for two weeks and I chose to spend time with her instead of scrapping, hopefully I can get caught up before by the end of the week. She's the shinning star of this layout and we are always thrilled when she's here.

A Perfect Day

Finally I did the two pages the sketch actually calls for, I'm so proud of myself. To be honest I kept it close to the sketch but did add in some papers. The strips I had went so well together so I made use of them. All of the patterned paper strips are actually from one 12x12 border sheet piece of paper. The striped and diamond patterned pieces happened to be big enough that I could cut them in half to make them stretch. The summer fun piece there wasn't enough of so I just cut it to give the illusion that it goes all the way across. After that I realized that I could have done that with the other pieces but I liked them smaller, the full width seemed far too large.

A Perfect Day Title Close-up

When I thought I was all finished there was this awkward gap between the title and the lower embellishment cluster. A Smash flag and stamp from Studio Calico helped give me a nice smooth transition and makes the title and embellishment cluster read as one cohesive unit. I love when I have a problem and when I figure out a fix it ends up better than I originally planned.

A Perfect Day Close-up

I broke out my sewing machine again and stiched three heart punches together. The back is punched using an old EK Success Scalloped Heart Punch and the others were punched from the Stampin' Up Full Heart punch. I first planned on having the vellum piece be over the top but that muted the paper a little more than I wanted so I stuck it in the middle and used some pop dots to separate the layers so it can be seen. It's a very subtle touch but I think it gives the pieces a little something extra.

A Perfect Day Close-up #2

One thing that I try to do on every page is make sure that I have three embellishment clusters and that they have repeating elements. These all have one of my stitched hearts, a stamped flag, a brad, at least one cloud, and heart stickers. Little things that help move your eye around the page.

Thanks for stopping by!

Scrapbook Zone Haul

Scrapbook Zone is located in Cabot, Arkansas. If you can make the drive I highly recommend it, she has a ton of goodies packed in the store. The crop room is huge and I hope to make it one at some point, she actually has some free crops, a rarity in the scrapping world.

Thanks for watching.

Tuesday, June 18, 2013

Scrapbook Generation Haul

Day two in my week of haul videos. Hope they aren't boring you so far.

Today's haul comes from Scrapbook Generation, if you like sketches chances are you've heard of them. My husband decided to surprise me with a day trip to Springfield, MO, that meant we were in a car for over 8 hours just to do some scrapbook shopping. I love that man.

Thanks for watching!

Monday, June 17, 2013

A Cherry On Top Haul

My birthday was just over a week ago now and for the past couple of years I go a little crazy around this time. It's the perfect time to have a birthday since I have an excuse to pick up the remaining CHA relases I wanted before the next CHA rolls around. While I realize it is no longer called CHA I refuse to call it by anything else. What can I say, I'm old and set in my ways.

First up to kick off a week of haul videos is a very large order from A Cherry On Top. This isn't a normal sized order for me but I still had lots that I wanted before July kicks in and I have a whole new mile long wish list.

Thanks for watching.

Monday, June 3, 2013

SG Blog Hop or it was supposed to be.

So, this layout was supposed to be part of the Scrapbook Generations blog hop that centered around people that love to use their sketches. If you look back at my layouts you will see that I am a huge fan.

For this layout I broke out my new One on One book. I love this book, it's perfect for those like me who do more one-page sketches. It might only be supposed to be one photo layouts but there are several you could add more photos with just a bit more planning.

I used sketch #8 in the book and changed quite a few things. Making a frame means gave me less of a canvas to work with but it also allowed me to add a bit more color. I straightened up the circles in the sketch since I couldn't make the wave pattern because of the smaller canvas. Then I simply used each circle as a sort of mini canvas adding punches, brads, rhinestones, and a few extra baubles.

Thanks for stopping by.